
When you decide to wire in a video doorbell, your first priority must be safety, which involves turning off the power at the breaker. You’ll need to assess the existing wiring to confirm it meets the voltage specifications, typically between 16-24 VAC. As you prepare to connect the doorbell using a wiring harness or jumper cables, precise attention to detail is essential for a secure installation. However, the wiring process is just the beginning; understanding how to test and troubleshoot the system effectively is equally important, and the nuances of this can greatly impact performance.
Understanding Video Doorbell Types
When considering the installation of a video doorbell, grasping the different types available on the market is pivotal. Each type has unique installation tips and power sources that influence your decision.
Wired video doorbells require a direct connection to an existing power source, typically a doorbell transformer. This guarantees consistent power and often superior video quality due to a stable connection.
Battery-powered models offer flexibility, as they run on rechargeable batteries, eliminating the need for wiring. However, you’ll need to monitor battery life to maintain functionality.
PoE (Power over Ethernet) video doorbells combine power and data through a single Ethernet cable, making them ideal for areas lacking existing wiring.
Before installation, conducting a compatibility check with your home’s current wiring or network setup is vital. Additionally, consider the security features of each type; wired models often provide stronger security due to their reliable power source.
Ultimately, understanding the nuances of these video doorbell types will guide you toward the best choice for your home, ensuring that you enjoy the benefits of enhanced security and convenience.
Tools and Materials Needed
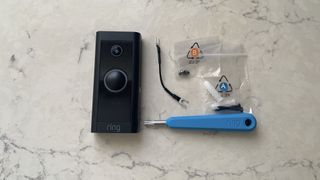
Selecting the right tools and materials is essential for a successful video doorbell installation, particularly for wired models that require a direct connection to your home’s electrical system. To begin, gather essential tools like a screwdriver, wire strippers, voltage tester, and, if necessary, a drill equipped with a masonry bit for brick or stucco surfaces.
Your materials list should include mounting screws, wire nuts, and the video doorbell itself, ensuring video doorbell compatibility with your existing wiring. It’s wise to consult the manufacturer’s instructions for any specific tools or materials needed for your model.
When employing proper wiring techniques, always follow safety precautions. Turn off the power before starting your installation to avoid electrical hazards.
Pay attention to common mistakes, such as neglecting to secure connections or overlooking the need for a bypass cable in certain setups.
Preparing Your Existing Wiring
Before delving into the installation of your video doorbell, it’s essential to prepare your existing wiring to guarantee compatibility and optimal performance. Start by verifying the voltage compatibility of your wiring; it should provide between 16-24 VAC at 50-60Hz, with a maximum of 40VA. This range is vital for powering the video doorbell effectively.
Next, check the specifications of your transformer. It must meet the voltage and power requirements to prevent any damage to the doorbell unit. If the voltage is too low, it may trigger Event Response mode, leading to performance issues.
Additionally, assess your chime system’s compatibility with the new doorbell. An incompatible chime can cause wiring issues that might disrupt the functionality of the doorbell. Confirm all components are aligned with the requirements set forth in the manufacturer’s instructions.
Step-by-Step Wiring Process
With your existing wiring properly prepared, you can now proceed to the wiring process for your video doorbell. Begin by turning off the power at the breaker to guarantee safety.
Next, identify the existing wiring and verify its compatibility with the video doorbell’s voltage requirements. Consult the manufacturer’s instructions for specific wiring techniques tailored to your model.
Use the provided wiring harness or jumper cables to connect the doorbell to the existing wiring system. Securely attach the wires to the designated terminals on the video doorbell, making sure each connection is tight and properly aligned. This step is essential for maintaining functionality and preventing electrical issues.
As you work, pay attention to cable management. Neatly arrange the wires to avoid tangling and ensure they’re shielded from damage. This not only enhances the aesthetic but also promotes longevity.
Testing and Troubleshooting
Once you’ve finished the wiring for your video doorbell, it’s crucial to test the connections to make certain everything functions correctly. Start by using a multimeter to measure the voltage levels at the doorbell terminals. Confirm that the transformer voltage aligns with the requirements specified by the manufacturer. A proper voltage reading confirms that the power supply is sufficient for your device.
If you encounter any issues, check for wiring problems such as loose connections or damaged wires. These can significantly impact performance.
If the doorbell doesn’t respond, consider using a bypass cable to isolate the doorbell chime and test the functionality of the video doorbell directly. This step helps identify whether the issue lies within the chime or the doorbell itself.
Conclusion
To sum up, effectively wiring in a video doorbell improves your home’s security and convenience. By following the specified steps—confirming you’ve turned off the power, checking voltage requirements, and securely linking the wires—you’ll achieve a dependable installation. Remember, always test the connections with a multimeter before restoring power to confirm everything’s functioning correctly. With meticulous attention to detail, your video doorbell will not only operate efficiently but also enhance the value of your home.